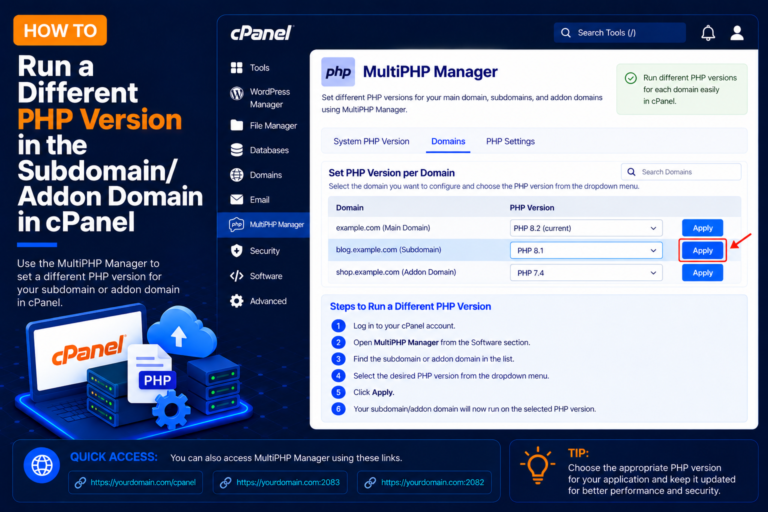
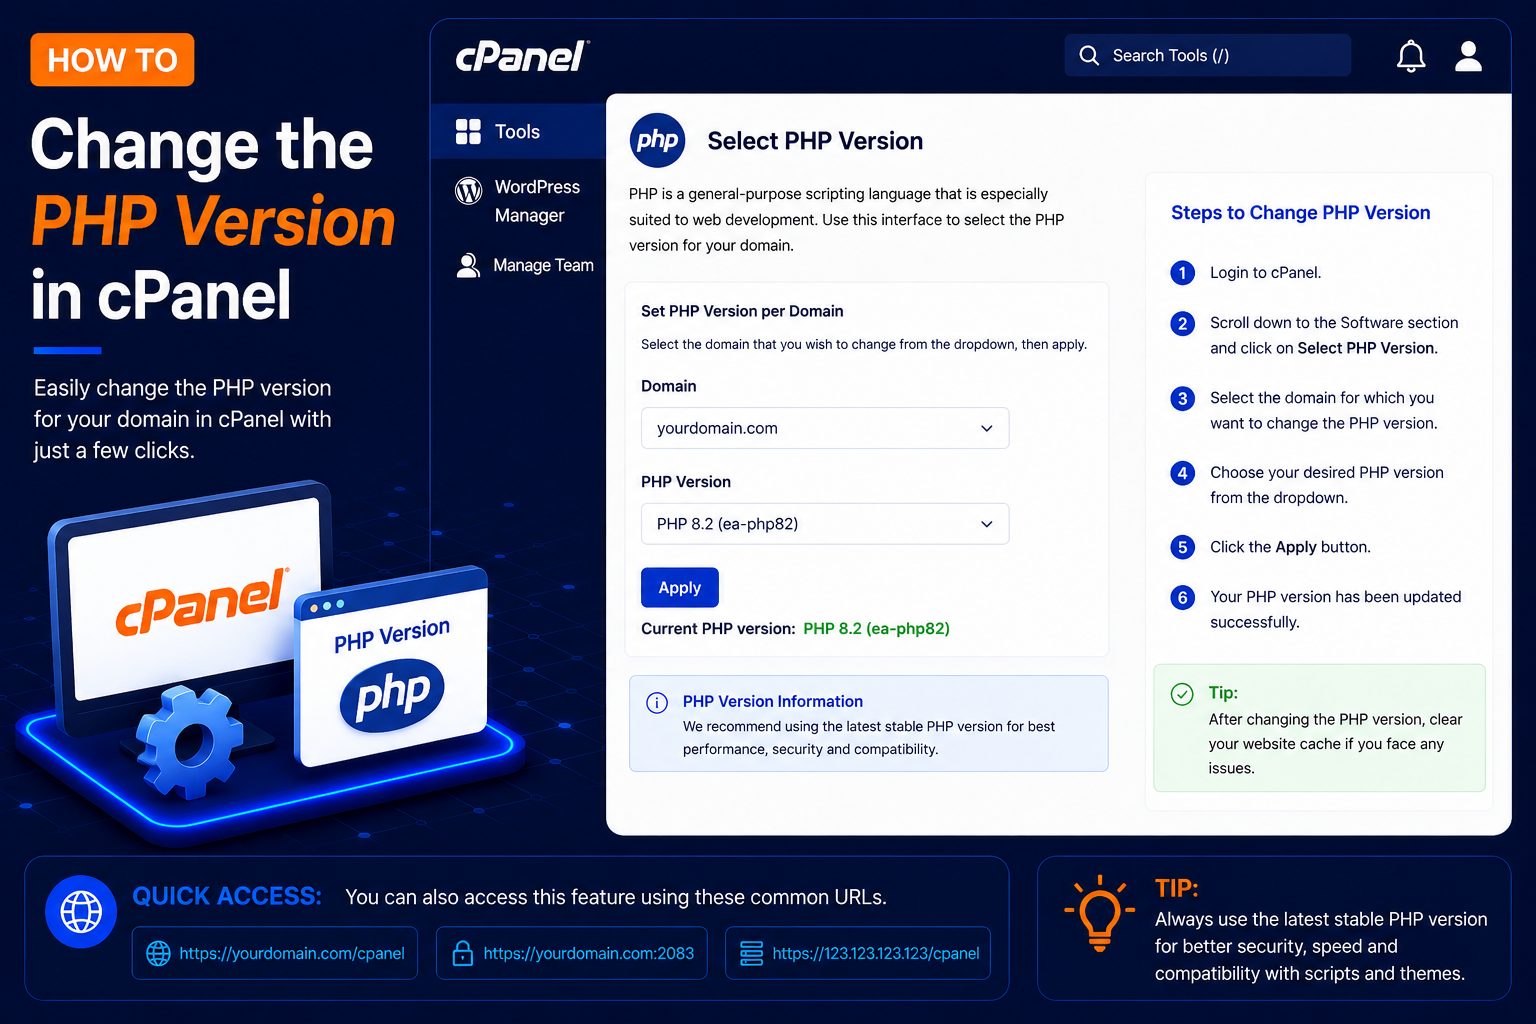
How to Change the PHP Version in cPanel
PHP is a server-side programming language used by WordPress and many other web applications. Sometimes you may need to change the PHP version to meet your website’s requirements, improve compatibility, or use a currently supported PHP release.
Every PHP release has a limited support period. Older versions eventually stop receiving security fixes, while newer plugins, themes and frameworks often require a recent version to work at all. Being able to switch the PHP version yourself means you can fix a “requires PHP x.x” message, test a site on a newer release, or temporarily roll back after an upgrade causes problems, without waiting for your hosting provider.
cPanel commonly provides tools such as MultiPHP Manager or, on some hosting platforms, Select PHP Version. This guide uses MultiPHP Manager, which lets you set a different PHP version for each domain in your account.
Before You Change the PHP Version
Before changing PHP, it is recommended to:
- Create a backup of your website files and database.
- Check whether your website or application supports the new PHP version.
- Update WordPress, themes, and plugins when appropriate.
- Note your current PHP version so you can switch back if necessary.
Changing PHP can cause errors if your website uses older or incompatible code.
How to Change the PHP Version Using MultiPHP Manager
Step 1: Log In to cPanel
- Enter your cPanel Username and Password, then click Log in.
Step 2: Find MultiPHP Manager
- After logging in, locate the Software section.
- Click MultiPHP Manager.
- You can also search for MultiPHP Manager using the cPanel search bar.
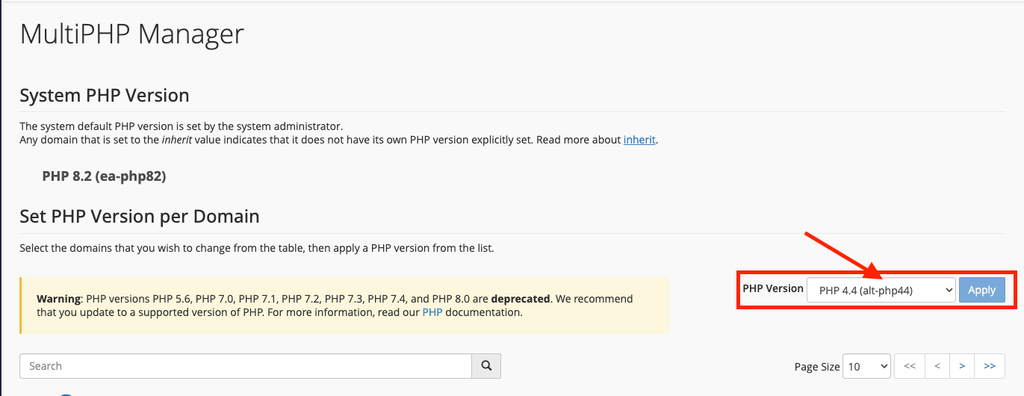
Step 3: Select Your Domain
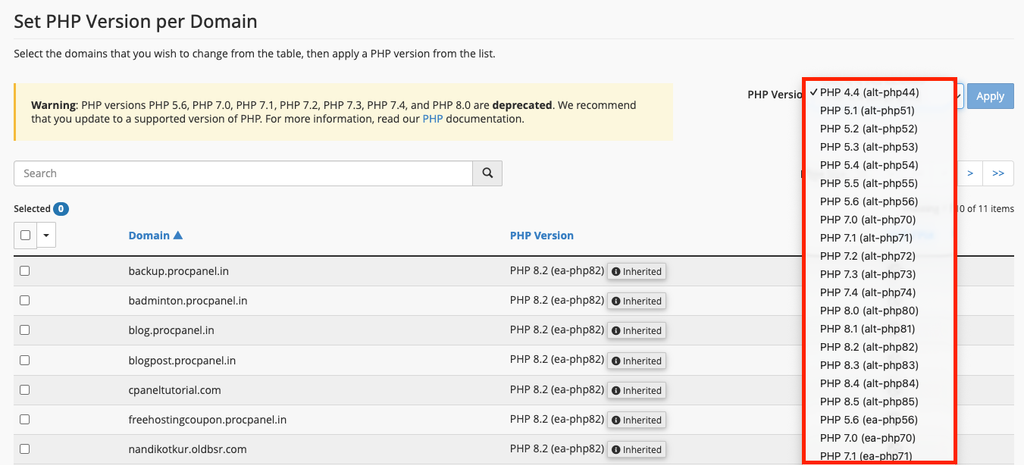
- Inside MultiPHP Manager, you should see a list of domains associated with your cPanel account.
- Find the domain for which you want to change the PHP version, for example: example.com
- Select the checkbox next to the domain.
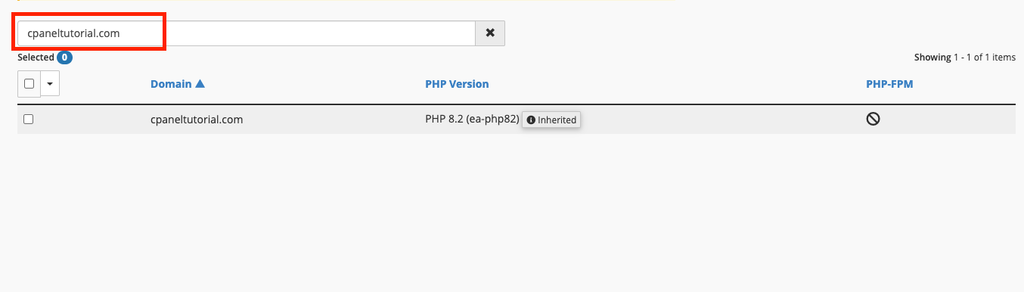
Each row also shows the domain’s current PHP version. If it says inherit, the domain is using the default version set for the account or server, so it will change automatically whenever that default changes.
Step 4: Select the PHP Version
- Find the PHP Version dropdown.
- Depending on the versions installed by your hosting provider, you may see options such as: PHP 8.1, PHP 8.2, PHP 8.3, PHP 8.4
- The exact PHP versions available on your account can vary.
- Select the PHP version required by your website.
Step 5: Apply the PHP Version
- After selecting the required PHP version, click Apply.
- Wait for cPanel to confirm that the PHP version has been updated.
Step 6: Check That the New Version Is Active
The change normally takes effect within a few seconds. To confirm it, use one of these methods:
- WordPress: go to Tools → Site Health → Info and open the Server panel. It shows the PHP version the site is running.
- Any website: create a file named
info.phpin the domain’s document root containing<?php phpinfo(); ?>, open it in your browser, check the version at the top, and then delete the file. Leaving a phpinfo file online exposes server details.
Finally, browse the important pages of your website, log in to the admin area and test forms or checkout pages to make sure everything still works.
Common Problems and How to Fix Them
The website shows a blank page or HTTP 500 error
This usually means some code is not compatible with the new version, or a required PHP extension is not enabled. Switch back to the previous version in MultiPHP Manager to bring the site back online, then update the theme and plugins, or check the error_log file in the site folder to see which file caused the error.
Error about a missing extension
Each PHP version has its own set of enabled extensions. If you see a message such as a missing MySQL, mysqli, intl or imagick extension after switching, enable it for the new version (on CloudLinux servers this is done under Select PHP Version → Extensions) or ask your host to install it. See our guide on How to Fix “PHP Installation Appears to Be Missing the MySQL Extension” in cPanel.
The version does not seem to change
MultiPHP Manager stores the setting as a handler line in the domain’s .htaccess file. If a migration or plugin left an old handler line in that file, or a WordPress cache is serving old pages, you may still see the previous version. Clear caches and check .htaccess for duplicate AddHandler or AddType PHP lines. On CloudLinux servers that also offer Select PHP Version, that tool generally applies only when the domain is using the default/inherited version in MultiPHP Manager; menu behaviour varies by host, so ask support if unsure.
Deprecated warnings appear on the page
Newer PHP versions mark some old functions as deprecated. These notices are not always fatal, but they should not be shown to visitors. Turn off display_errors in MultiPHP INI Editor and update the code or plugin responsible.
Tips and Best Practices
- Use a PHP version that is still actively supported and that your application officially supports.
- Test the new version on a staging copy or subdomain before changing a busy live site.
- Change one domain at a time so you know which site is affected if something breaks.
- Keep WordPress core, themes and plugins updated; outdated code is the most common reason upgrades fail.
- After switching, review PHP limits such as
memory_limitandupload_max_filesize, because settings can differ between versions.
Frequently Asked Questions
Will changing the PHP version delete my website files?
No. Changing the version only changes which PHP engine runs your code. Your files, database and emails are not touched.
Can I use different PHP versions for different domains?
Yes. MultiPHP Manager lets each domain, subdomain or addon domain use its own version. Read How to Run a Different PHP Version on a Subdomain or Addon Domain for details.
I don’t see MultiPHP Manager in my cPanel. What should I do?
Some hosts hide it and offer Select PHP Version instead, or manage PHP themselves. Use the cPanel search bar, and if neither tool appears, contact your hosting provider.
How do I go back to the old version?
Repeat the same steps, select the version you noted earlier and click Apply. The rollback takes effect straight away.
Conclusion
Changing the PHP version in cPanel takes only a minute with MultiPHP Manager: select the domain, choose the version and click Apply. Take a backup first, confirm the new version is active, test your site carefully, and keep a note of the previous version so you can roll back quickly if anything goes wrong.