
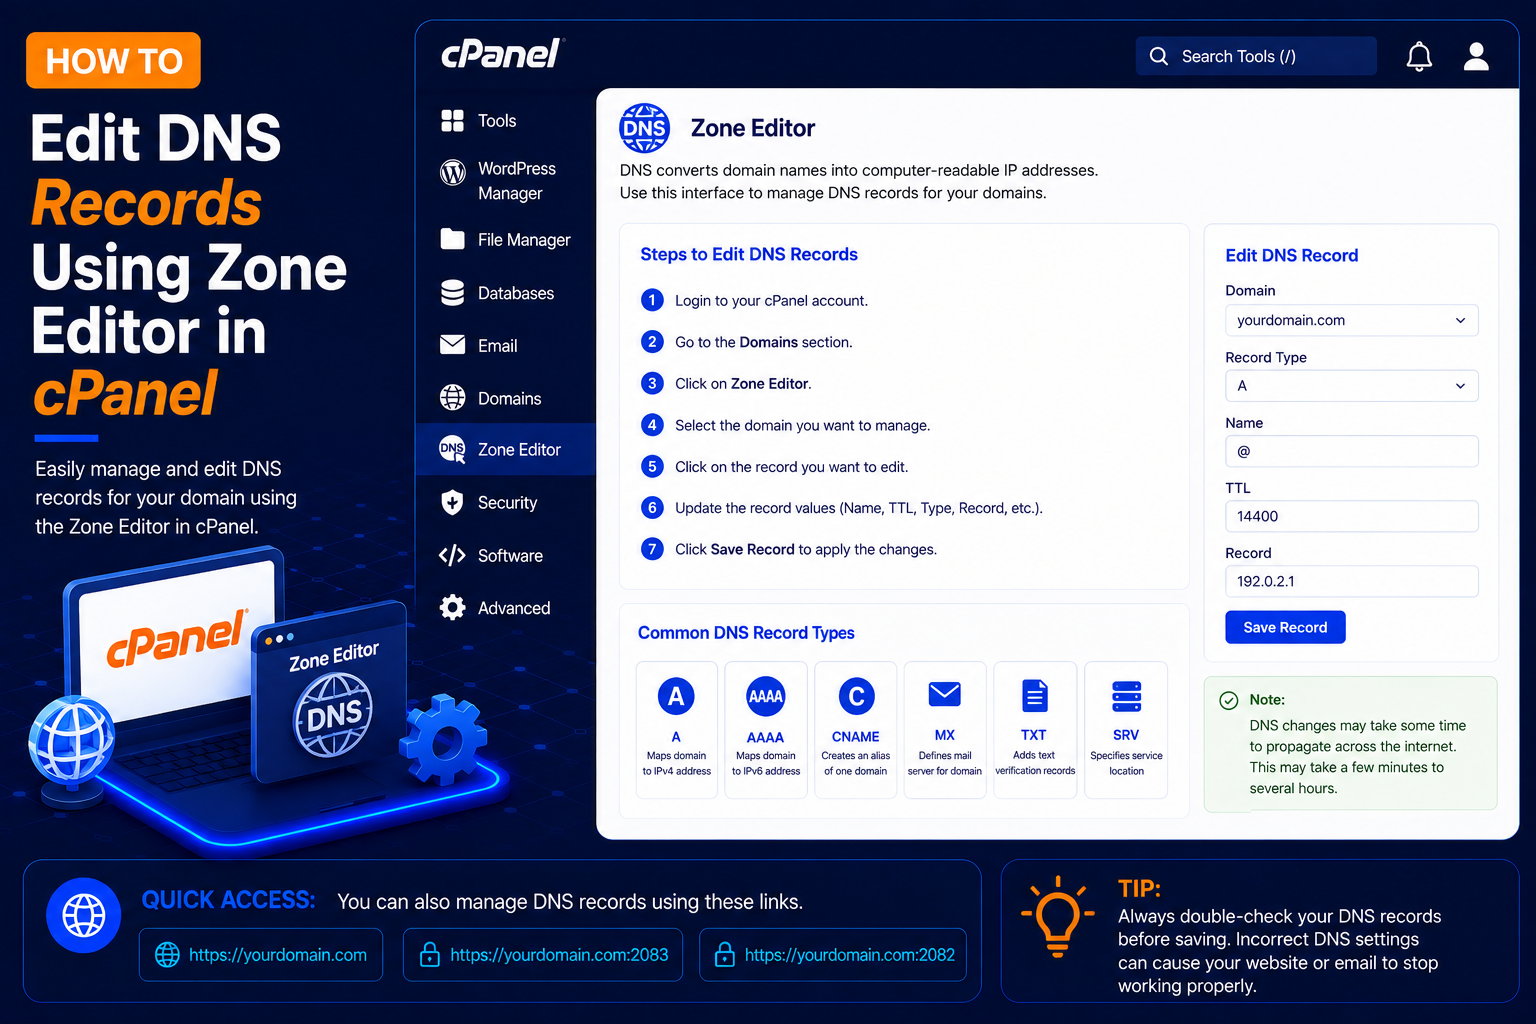
How to Edit DNS Records Using Zone Editor in cPanel
DNS (Domain Name System) records control how your domain connects to websites, email servers, verification services, and other online services.
If your hosting account uses cPanel, you can easily add, edit, or delete DNS records through the Zone Editor. You will typically need it when you connect a domain to an external service, verify domain ownership for Google or Microsoft, set up email with another provider, or point a subdomain to a different server.
In this guide, you will learn how to edit DNS records using the Zone Editor in cPanel.
What Is the cPanel Zone Editor?
The Zone Editor is a cPanel feature that allows you to manage the DNS records associated with your domains. Using Zone Editor, you can manage common DNS records such as:
- A Record – points a name to an IPv4 address (for example, your website server).
- AAAA Record – points a name to an IPv6 address.
- CNAME Record – makes one name an alias of another name, such as www pointing to your main domain.
- MX Record – tells other mail servers where to deliver email for your domain.
- TXT Record – stores text, used for SPF, DKIM, DMARC and domain verification.
- SRV Record – points specific services (such as some chat or calling services) to a host and port.
- CAA Record – lists which certificate authorities may issue SSL certificates for your domain.
The exact options available may depend on your hosting provider and cPanel configuration.
Before You Start
- Zone Editor changes only take effect if your domain uses your hosting provider’s nameservers. If your nameservers point to Cloudflare or your domain registrar, edit DNS there instead.
- Take a screenshot or note of any record before you change it, so you can restore the old value if needed.
- Have the exact values from the service you are connecting (IP address, target hostname or TXT value) ready to copy and paste.
How to Edit DNS Records in Zone Editor
Step 1: Log In to cPanel
- Enter your cPanel username and password and click Log In.
Step 2: Open Zone Editor
After logging in to cPanel:
- Locate the Domains section.
- Find Zone Editor.
- Click Zone Editor.
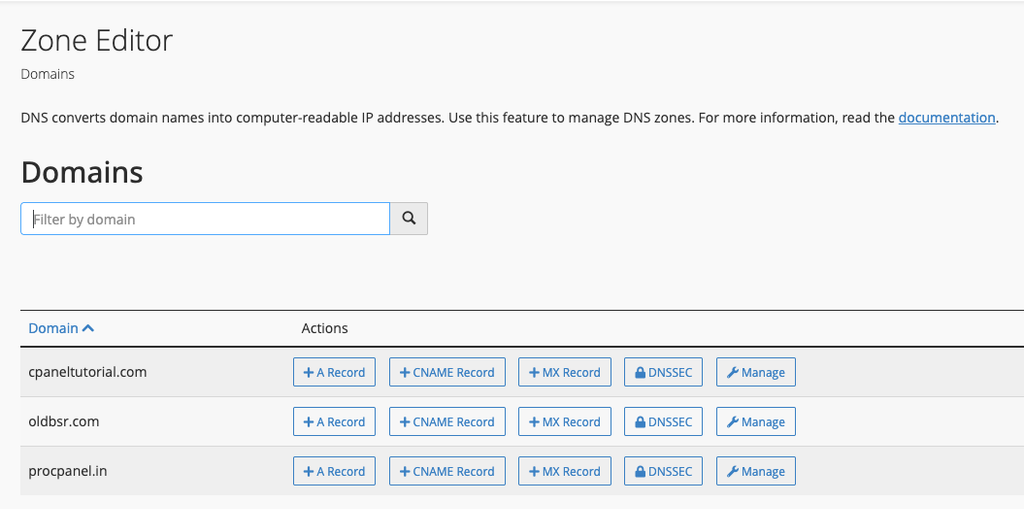
Step 3: Select Your Domain
- Find the domain whose DNS records you want to modify.
- Depending on your cPanel version, you may see quick-add options next to the domain, such as:
- A Record
- CNAME Record
- MX Record
- Manage
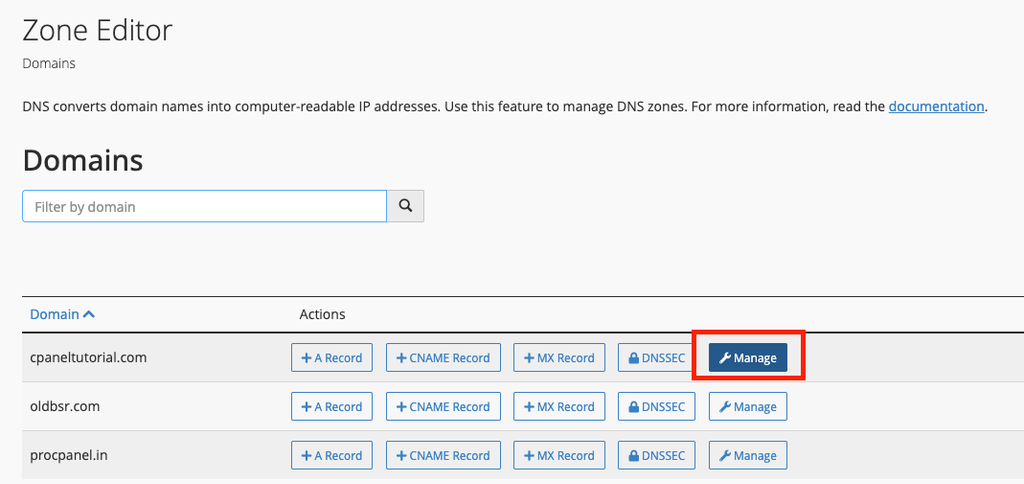
Click Manage next to the required domain.
Step 4: View Existing DNS Records
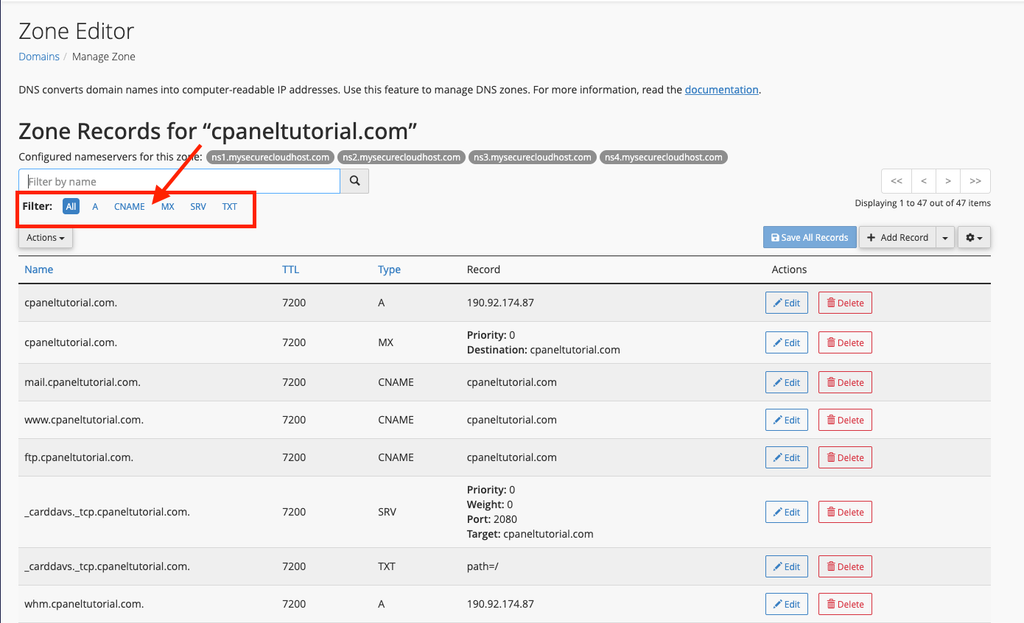
- After clicking Manage, cPanel will display the DNS records configured for your domain.
- You may see records such as:
AAAAACNAMEMXTXT
You can use the search or filter options to quickly locate a particular DNS record.
Step 5: Edit an Existing Record
- Find the record you want to change and click Edit in the Actions column.
- Update the Name, TTL or Record value as needed. For example, change the IP address of an A record when moving your website to a new server.
- Click Save Record.
Step 6: Add a New Record
- Click + Add Record (in some versions, use the arrow next to it to choose the record type directly).
- Select the record Type, such as A, CNAME or TXT.
- Enter the Name. You can type just the subdomain part, such as shop; cPanel adds your domain automatically.
- Enter the Record value, for example an IP address, a target hostname or the text value given by the service.
- Leave the TTL at its default unless you have a reason to change it, then click Add Record.
Step 7: Delete a Record
Click Delete next to the record and confirm. Deleting the wrong A or MX record can take your website or email offline, so double-check before confirming.
How Long Do DNS Changes Take?
The change is saved on your hosting server immediately, but other networks may keep the old value cached until the record’s TTL (time to live) expires. This is often a few minutes to a few hours, and in some cases longer. You can check the current value with an online DNS lookup tool or with commands such as nslookup or dig on your computer.
Common Problems and How to Fix Them
My changes have no effect
Check where your domain’s nameservers point. If they are not your hosting provider’s nameservers, records in cPanel’s Zone Editor are ignored by the internet.
Cannot add a CNAME record
A CNAME cannot exist on a name that already has another record, and it cannot be used on the root domain itself. Remove the conflicting A record for that name first, or use an A record instead.
Emails stopped arriving after an MX change
Make sure the MX record points to a hostname (not an IP address) and that the priority is correct. Also check Email Routing in cPanel: set it to Remote Mail Exchanger when email is hosted elsewhere, or Local when it is hosted on your cPanel server.
SPF verification fails
A domain should have only one SPF TXT record (starting with v=spf1). If a service asks you to add SPF, merge its include: value into your existing SPF record instead of adding a second one.
Tips and Best Practices
- Lower the TTL a few hours before a planned server move so the change spreads faster.
- Use cPanel’s Email Deliverability tool to check and repair SPF and DKIM records.
- Remove old records for services you no longer use.
- Never share your cPanel login just so someone can add a record; ask for the values and add them yourself.
Frequently Asked Questions
What does the dot at the end of a name mean?
cPanel shows fully qualified names ending with a dot, such as example.com.. It is normal and marks the end of the DNS name.
Can I reset my DNS zone?
Some cPanel versions offer a reset option, but it removes custom records. Contact your hosting provider if you are unsure.
Do I need Zone Editor to create a subdomain?
No. When you create a subdomain in cPanel, the required DNS record is usually added automatically.
Conclusion
cPanel’s Zone Editor gives you full control over your domain’s DNS. Open Zone Editor, click Manage next to your domain, and then add, edit or delete records as needed. Note old values before you change anything, allow time for propagation, and confirm the change with a DNS lookup.