
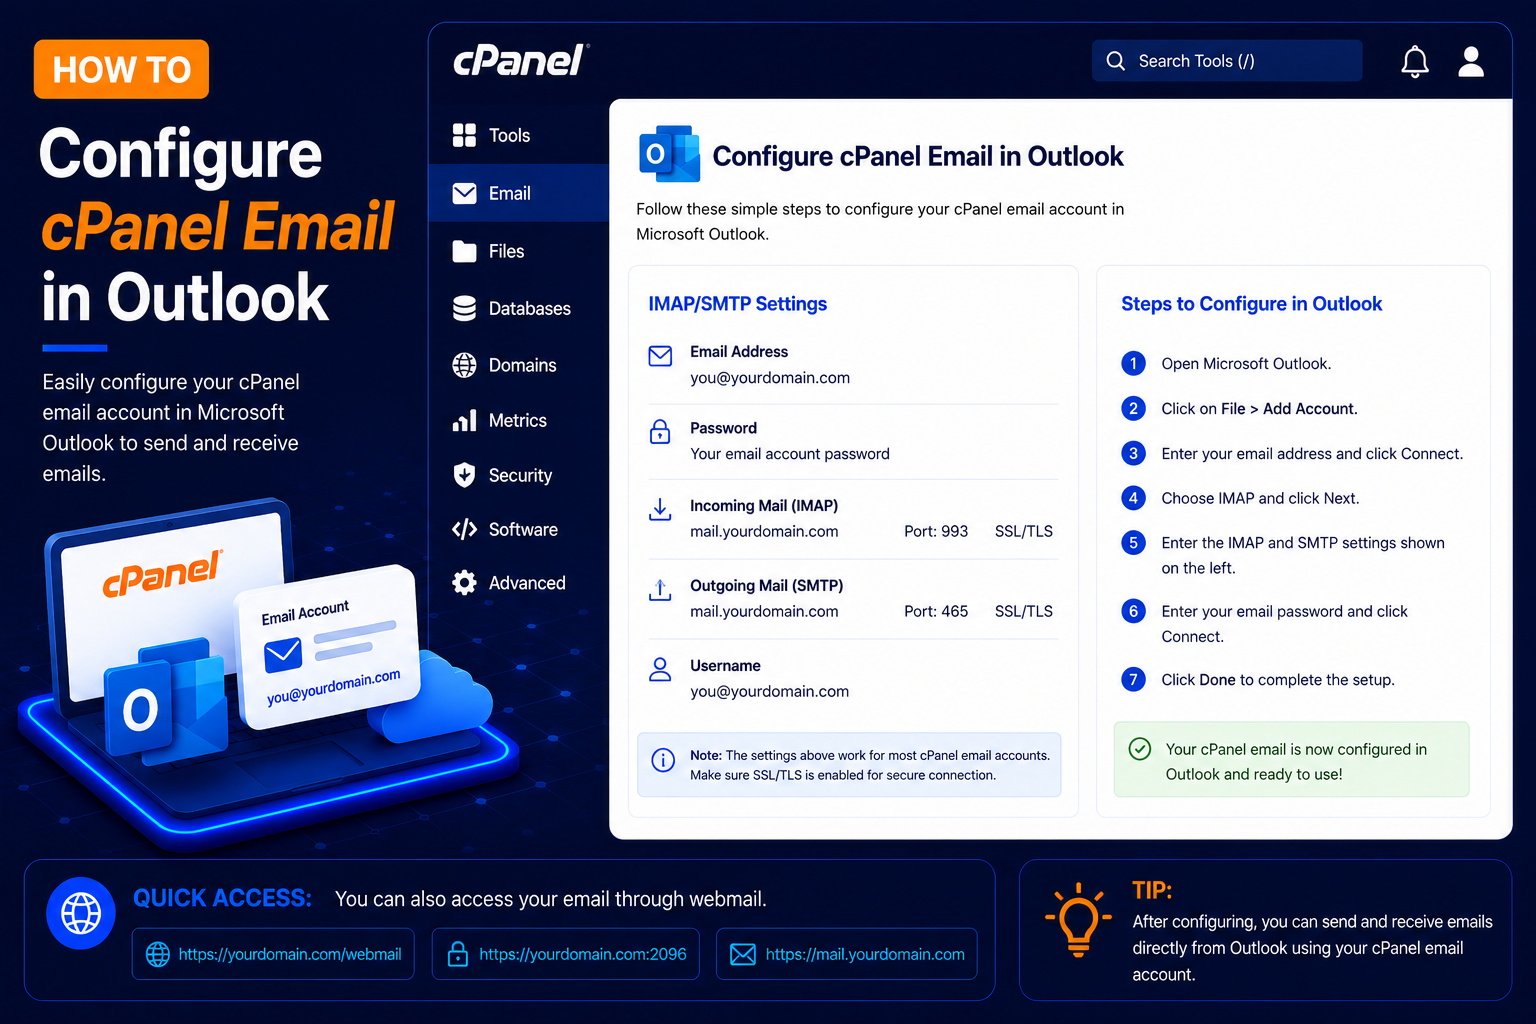
How to Configure cPanel Email in Outlook
If you have created a professional email address in cPanel, such as support@yourdomain.com, you can configure it in Microsoft Outlook to send and receive emails directly from your computer.
Using Outlook instead of Webmail gives you a familiar desktop inbox, offline access to messages you have already downloaded, desktop notifications, and the ability to manage several mailboxes in one place. The setup only needs a few server details from cPanel.
What Do You Need?
Before starting, make sure you have:
- A working cPanel email account
- Your complete email address
- Your email password
- Incoming mail server hostname
- Outgoing mail server hostname
- IMAP/POP3 and SMTP port details
- Microsoft Outlook installed on your computer
For most users, IMAP is recommended because it keeps email synchronized between Outlook, Webmail, phones, and other devices.
It is a good idea to log in to Webmail first with the same address and password. If Webmail login works, you know the password is correct before you start troubleshooting Outlook.
How to Set Up cPanel Email in Outlook
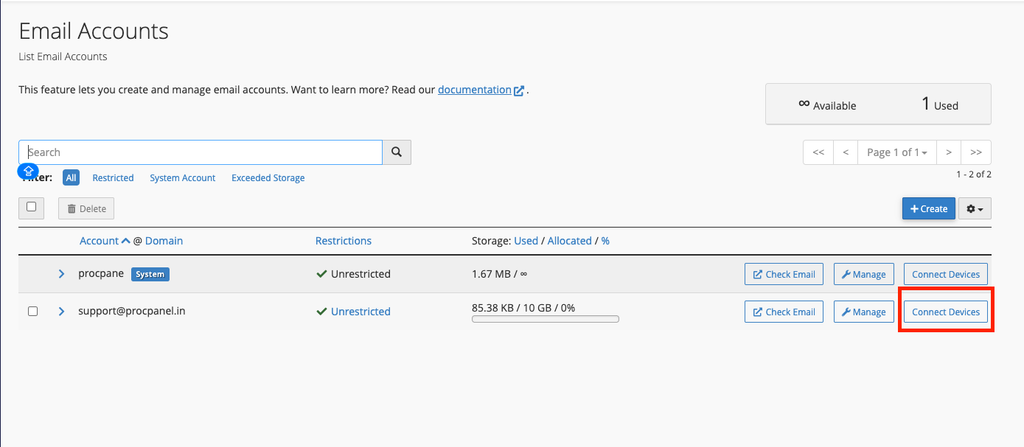
Step 1: Find Your Email Configuration Details in cPanel
- First, log in to cPanel.
- Go to: cPanel → Email Accounts
- Find the email account you want to configure.
- For example: support@yourdomain.com
- Click: Connect Devices
- Depending on your cPanel version, this may appear as Set Up Mail Client.
Step 2: Check the Mail Client Manual Settings
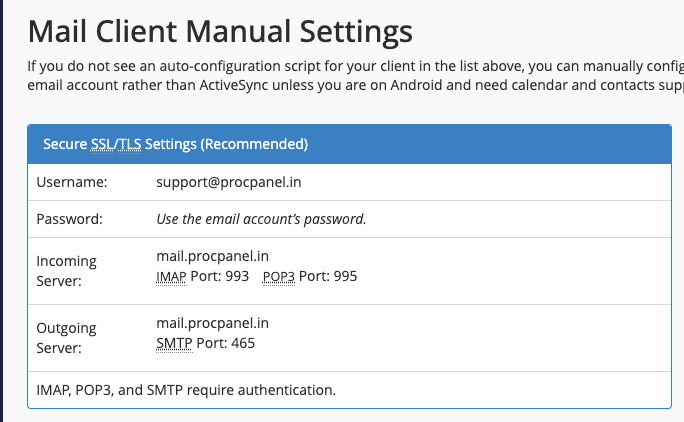
- On the Connect Devices page, look for the manual configuration settings.
- cPanel normally displays information under Secure SSL/TLS Settings, which is the recommended option.
- You may see details such as:
- Username: support@yourdomain.com
- Incoming Server: mail.yourdomain.com or the server hostname
- IMAP Port: 993
- POP3 Port: 995
- Outgoing Server / SMTP: mail.yourdomain.com or the server hostname
- SMTP Port: 465
Step 3: Open Microsoft Outlook
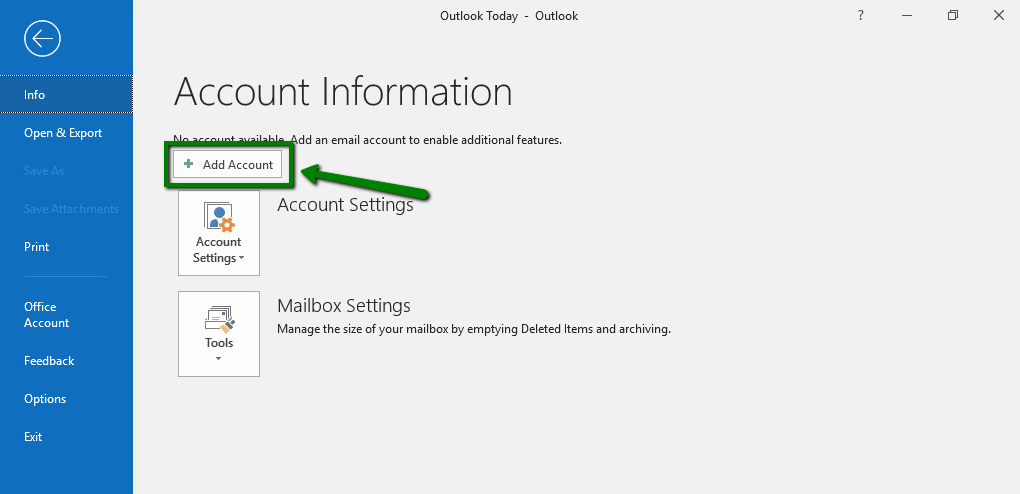
- Open Microsoft Outlook on your computer.
- Go to the account settings area and choose the option to add a new email account.
- The exact menus can differ between new Outlook, classic Outlook, Outlook for Mac, and different Microsoft 365 versions.
In classic Outlook for Windows, this is usually File → Add Account. In the new Outlook, open Settings → Accounts → Email accounts → Add account.
Step 4: Enter Your cPanel Email Address
- Enter your complete cPanel email address.
- For example: support@yourdomain.com
- Continue to the next step.
- If Outlook automatically detects the account correctly, follow the prompts.
- If automatic configuration fails or you want to enter the server settings yourself, select the available manual setup option.
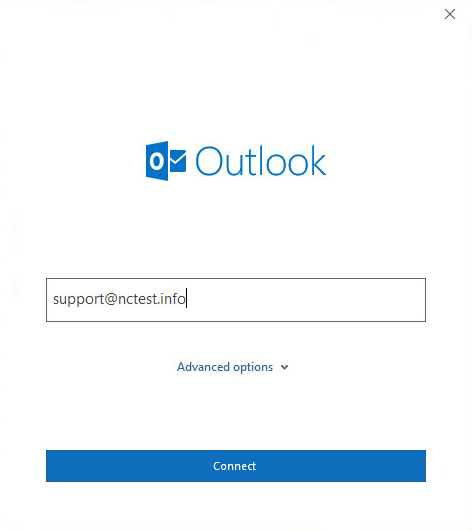
Step 5: Select IMAP
- For most users, select IMAP.
- IMAP keeps messages stored on the mail server and synchronizes them across multiple devices.
- For example, if you read an email in Outlook, its read status can also be synchronized with Webmail and your mobile device.
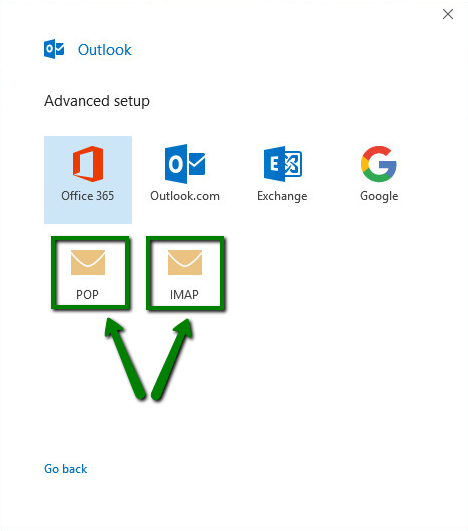
Step 6: Configure the Incoming Mail Server
- Enter the incoming mail settings shown in your cPanel Connect Devices page.
- A common secure IMAP configuration looks like:
- Server: mail.yourdomain.com
- Port:
993 - Encryption:
SSL/TLS - Username: support@yourdomain.com
- Password: Your email account password
Do not assume mail.yourdomain.com is correct for every server. Use the exact hostname provided by your hosting company or cPanel.
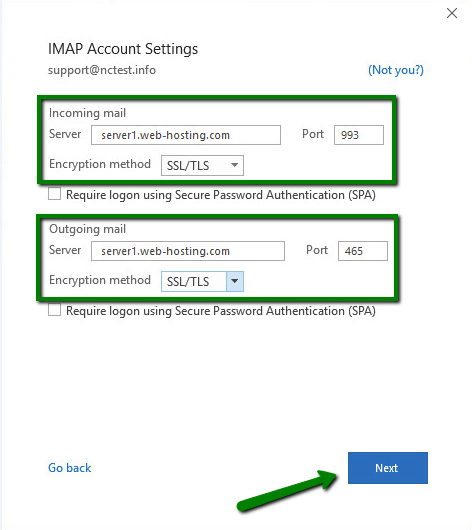
Step 7: Configure the Outgoing SMTP Server
- Next, enter the outgoing mail settings.
- A common secure configuration is:
- SMTP Server: mail.yourdomain.com
- Port:
465 - Encryption:
SSL/TLS - Username: support@yourdomain.com
- Password: Your email password
SMTP authentication should normally be enabled. Again, use the exact SMTP hostname, port, and encryption settings displayed in your cPanel account.
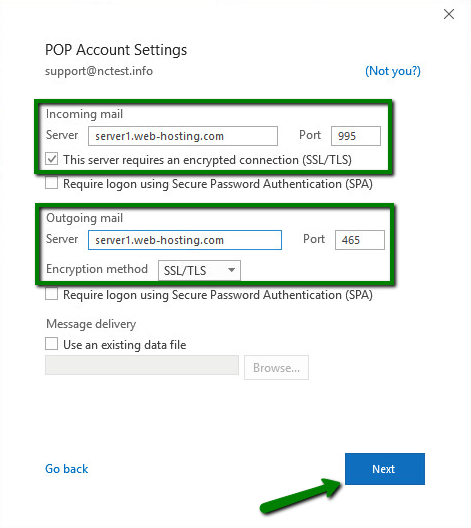
Step 8: Enter Your Email Password
- Outlook may ask you to enter the password for your mailbox.
- Enter the password associated with your cPanel email account.
- This is your email account password, not necessarily your cPanel login password.
Step 9: Complete the Account Setup
- After Outlook verifies the incoming and outgoing server settings, your email account should be added successfully.
- Complete the setup and open the mailbox.
Send a test message to another address, such as a personal Gmail account, and reply to it. If both sending and receiving work, the setup is complete.
Common Problems and How to Fix Them
Outlook Keeps Asking for the Password
This usually means the username or password is wrong. The username must be the full email address. Reset the mailbox password in cPanel → Email Accounts → Manage if needed, then update it in Outlook.
Receiving Works but Sending Fails
Check that SMTP authentication is turned on and that it uses the same username and password as incoming mail. Also confirm the port and encryption pair: 465 with SSL/TLS, or 587 with STARTTLS if your host recommends it. Some internet providers block outgoing port 25, so avoid it.
Certificate or Security Warning
If the SSL certificate does not match mail.yourdomain.com, Outlook will warn you. Use the server hostname shown on the Connect Devices page instead, or ask your host to make sure a valid certificate covers the mail subdomain.
Sent Items Are Missing in Webmail
With IMAP, Outlook should save sent messages to the server’s Sent folder. If they only appear in Outlook, check the account’s folder settings and map Sent Items to the server folder.
Tips and Best Practices
- Choose IMAP if you use more than one device; choose POP3 only if you deliberately want mail stored on one computer.
- Always use the secure SSL/TLS ports rather than the non-SSL ones.
- Keep an eye on your mailbox quota in cPanel, because a full mailbox stops receiving new email.
- Use a different, strong password for each email account.
Frequently Asked Questions
Should I use IMAP or POP3?
IMAP is better for most people because messages stay on the server and stay in sync across devices. POP3 downloads mail to one computer and may remove it from the server, depending on your settings.
Can I add the same email to Outlook on my phone?
Yes. Use the same IMAP and SMTP settings in the Outlook mobile app or any other mail app on your phone.
Why does cPanel show a different server name from mail.yourdomain.com?
Some hosts recommend the server hostname because the SSL certificate is issued for it. Both point to the same mail server; use the one your host recommends.
Conclusion
Configuring cPanel email in Outlook is straightforward once you have the correct settings from the Connect Devices page. Use IMAP, the secure ports, and your full email address as the username, and your mailbox will stay in sync between Outlook, Webmail, and your phone.